Lab 2 ITF Lab
Configuring Inetlligent Traffic Flow
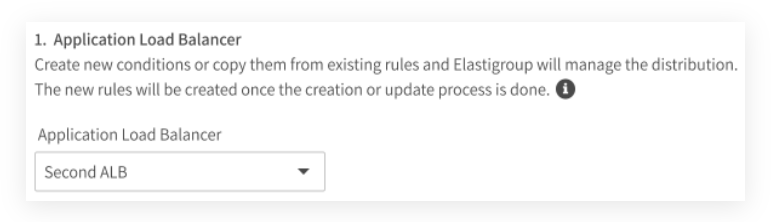
To enable ITF, go back to your first Elastigroup created in the Stateless Nodes category, select Actions, Edit Configuration and click on the networking tab. Click Intelligent Traffic.
You will see an option to select a load balancer. Click on the dropdown and select the load balancer name that corresponds with your username for the workshop.
For example user 1 should select user1 load balancer.
The ALB that has been set up for you will already have 1 listener configured on port 80. Select the listener as shown below to ensure Elastigroup will manage the distribution. The target group creation settings as shown below will replicate the currently configured target group settings and do not need to be changed.
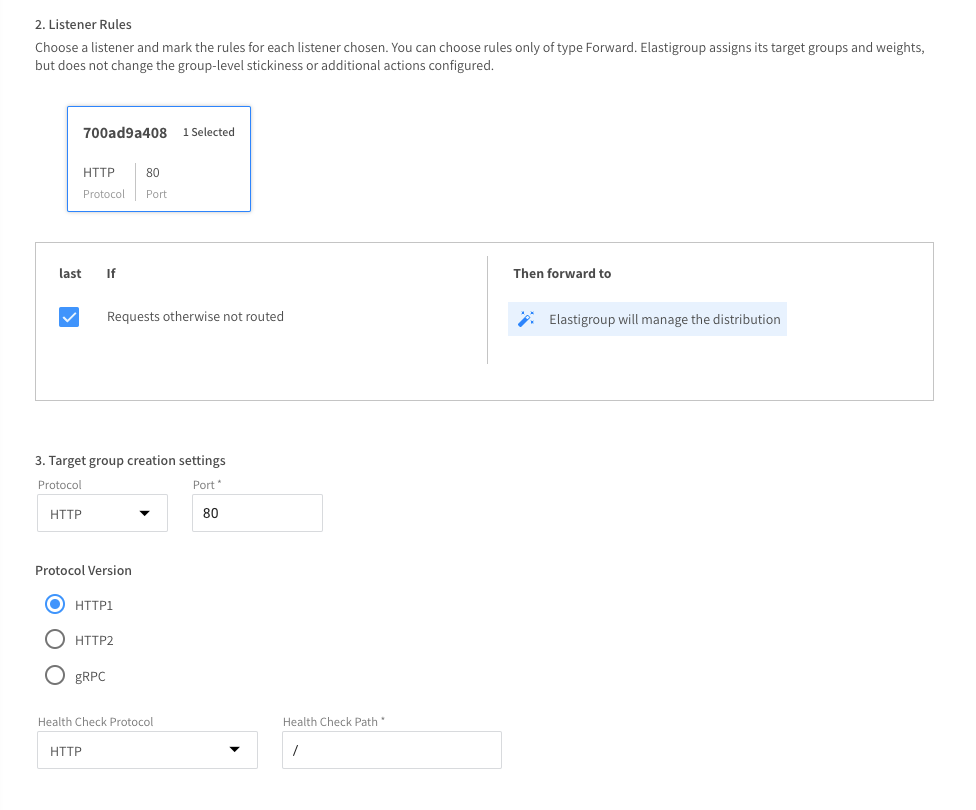
Scroll down on the page to the Auto Healing Section. Auto Healing is the Spot by Netapp way to ensure all of the instances within your Elastigroups are healthy. Elastigroup can be configured so that instances are confirmed healthy by the target groups that are dynamically created by Elastigroup.
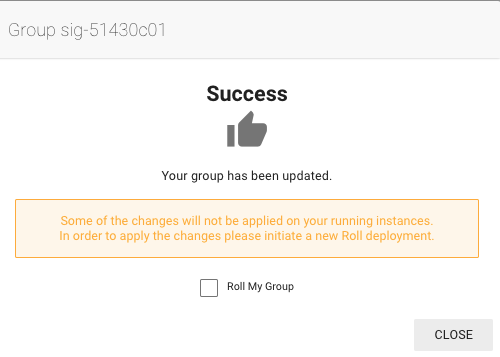
Once you updated this section click next in the bottom right corner until you reach the review tab and then click UPDATE.
Migration Process
Step 1
The migration process takes place per listener rule. Elastigroup will begin to create its own target group. and a stepwise process begins whereby Elastigroup assigns its target groups to the rule and drops the previously set target groups from the rule. During part of the process, traffic will be directed to both customer target groups and Elastigroup target groups. By the end of the process, all traffic will be directed to Elastigroup target groups only.
A migration process starts any time you provide a new rule to the group. This occurs as part of a creation or an update to an Elastigroup.
You can follow along in the Logs section of Elastigroup to monitor the work behind the scenes.
The migration process will take around 5 minutes to complete.

Step 2
Elastigroup will calculate the traffic distribution projected at the end of the process based on the total number of vCPUs in each of its target groups and assuming that all instances are healthy.
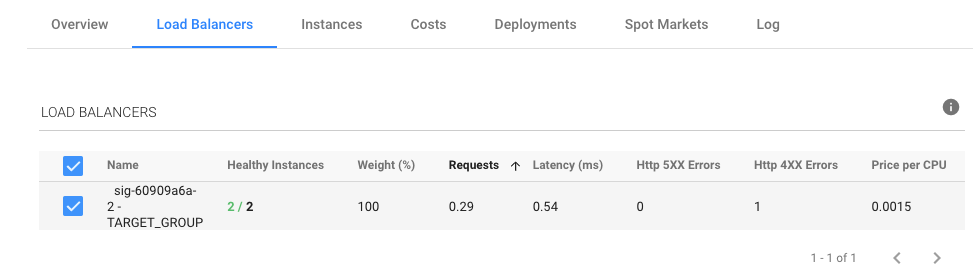
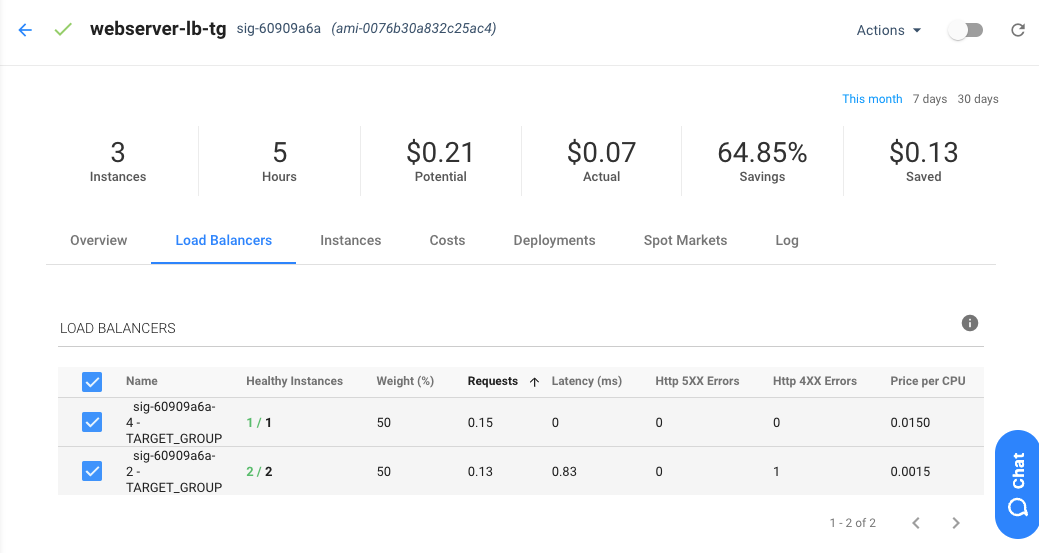
Once the migration process is finished click on the Load Balancers tab. You should now see newly created target group(s) with your Elastigroup ID as a prefix (sig-XXXXX) and a weight calculated by Elastigroup for routing traffic.
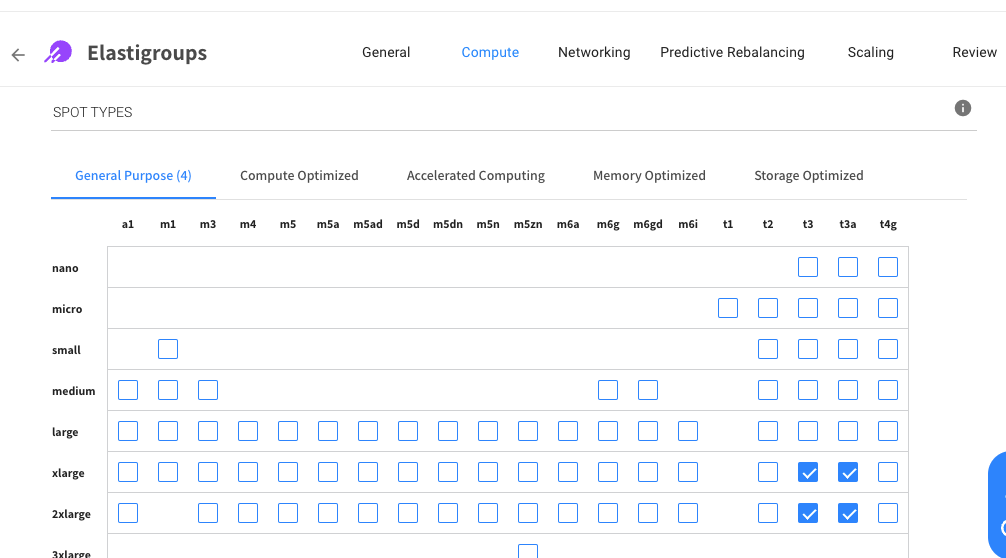
Now Let’s add in some more instance types and update capacity to see the magic of Intelligent Traffic Flow. Click on Actions in the top right –> Edit Configuration and click on the Compute Tab. Let’s modify the instance type selection as followed:
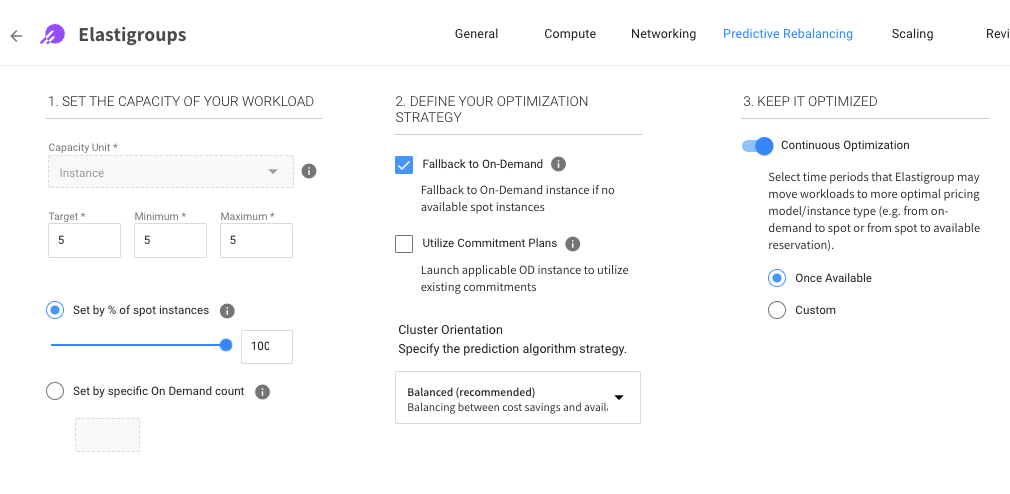
Once you updated this section click next in the bottom right corner until you reach the Predictive Rebalancing Tab and we will adjust the Target, Minimum and Maximum to 5.
Once you updated this section click next in the bottom right corner until you reach the review tab and then click UPDATE. Do not roll the group, Elastigroup will now create two more instances using the new instance whitelist.
Since the new instance whitelist contains instances with 4 VCPU instead of the 2vCPU small instances, Elastigroup will automatically provision a new target group for 4vCPU instances. You will also see that the weight of the traffic will be recalculated accordingly. You can check the Load Balancer tab again to verify.
The creation process of a new target group and registration to load balancer will take around 5 minutes to complete.
Now you can see how Elastigroup will give you the flexibility to run a large number of instance types and sizes within your groups that sit behind a load balancer. This also helps to ensure CPU utilization can be balanced throughout the groups and the Elastigroup autoscaler has multiple Spot markets to choose between.