Lab 1 Spot Market Scoring
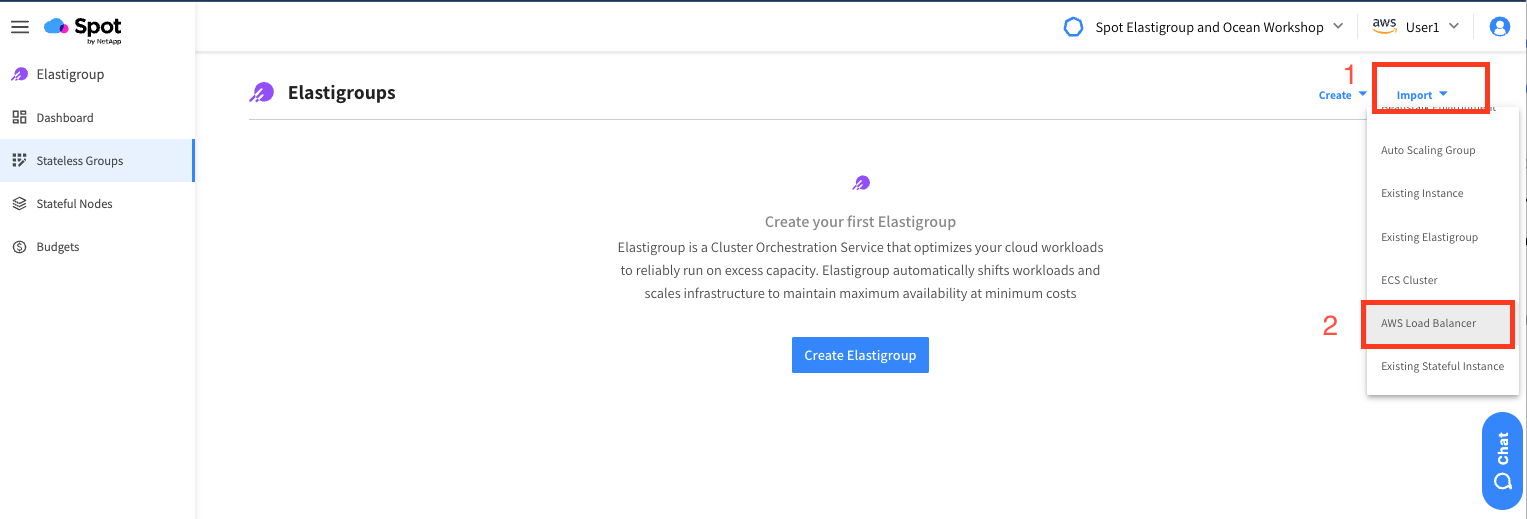
Within the Elastigroup Dashboard
Select the Stateless Groups and then Import, AWS Load Balancer
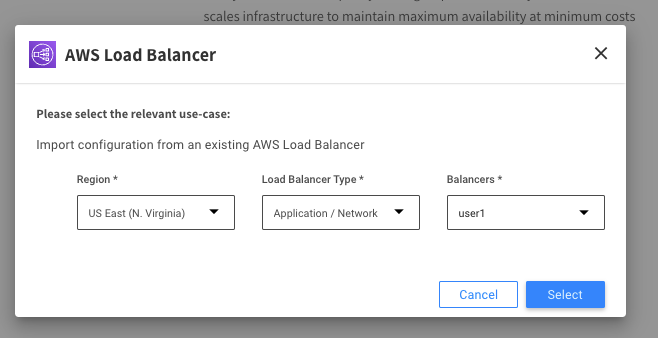
Click Select Region US East (North Virginia), Load Balancer Type (Application), Balancers: Select the load balancer that corresponds to your workshop username. Example: Workshop User1 (as shown in top right of screen) should select user1 alb. Once you have the correct load balancer selected, click on “Select” to proceed.
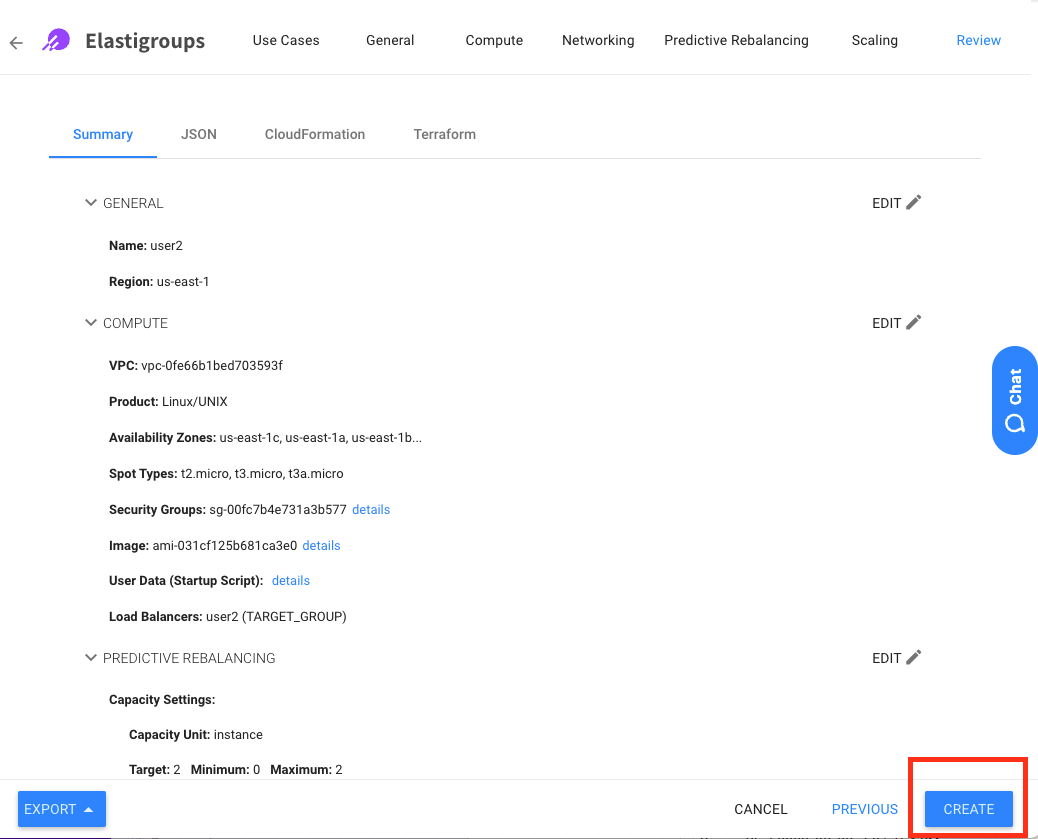
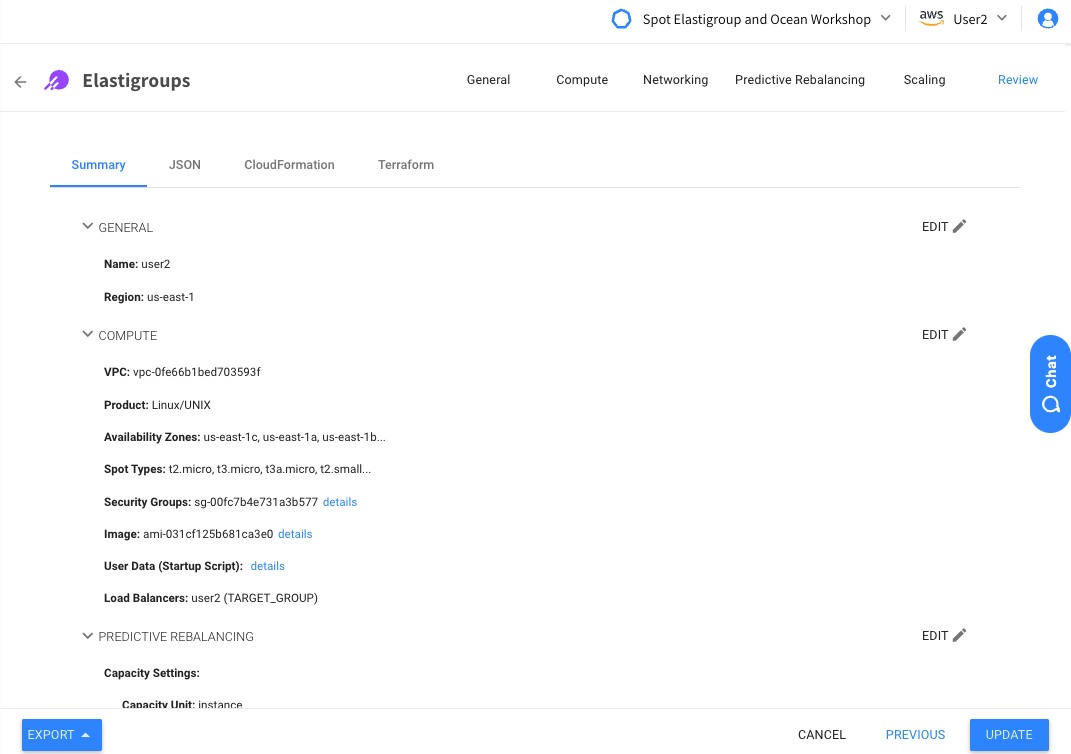
Elastigroup will now import all of the metadata necessary to create your Elastigroup. This includes VPC, AMI, AZ, Instance Types, Security Groups, User Data and more. Once you review this information, you can proceed by hitting create.
Elastigroups can also be provisioned through your preferred Infrastructure as Code Tool such as Cloudformation, Terraform, or API.
Once you click on create, Elastigroup will begin provisioning your infrastructure and redirect you back to the Overview tab.
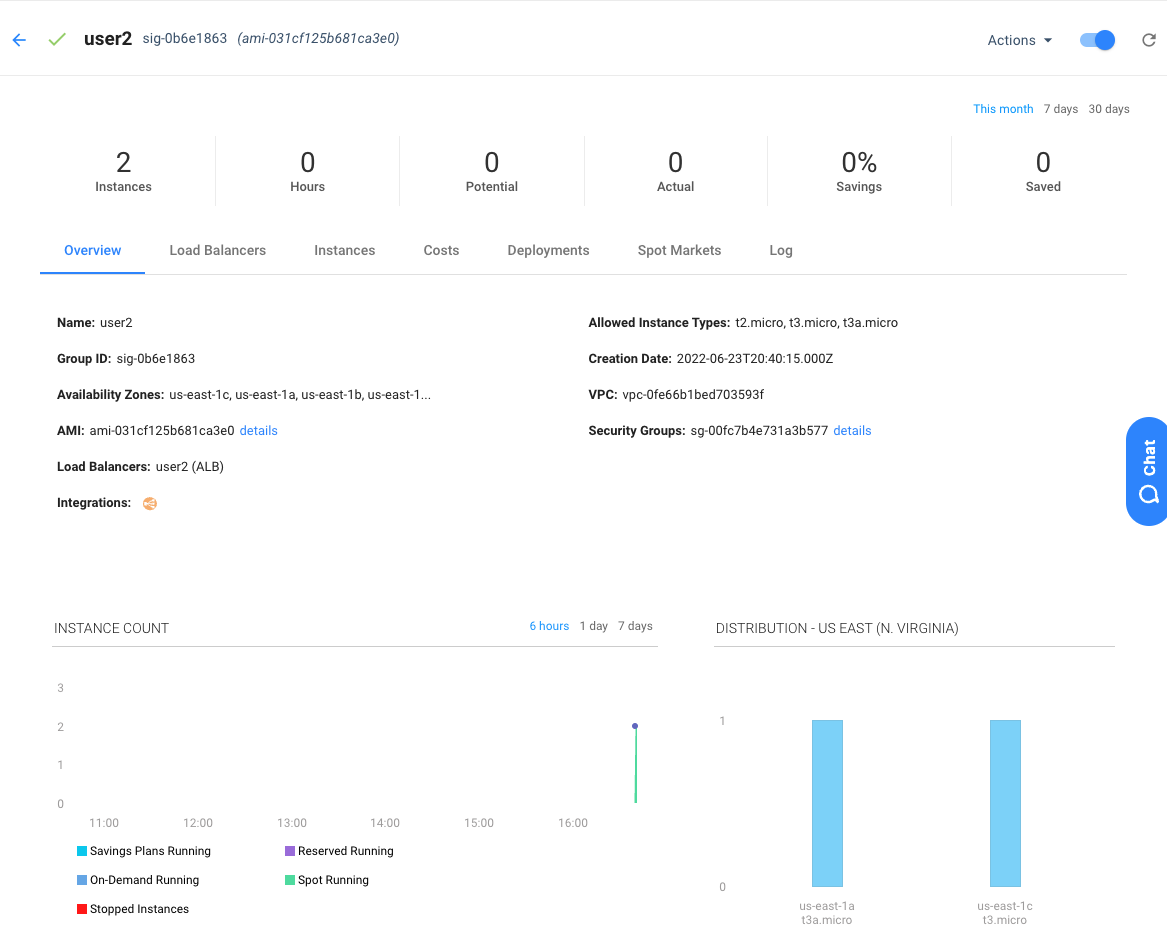
Let’s review the Load Balancer Tab. We will soon see the instance launched by Elastigroup register as healthy to the load balancer. You may need to refresh this page a few times as launching the new instance and passing the health checks may take a couple minutes.
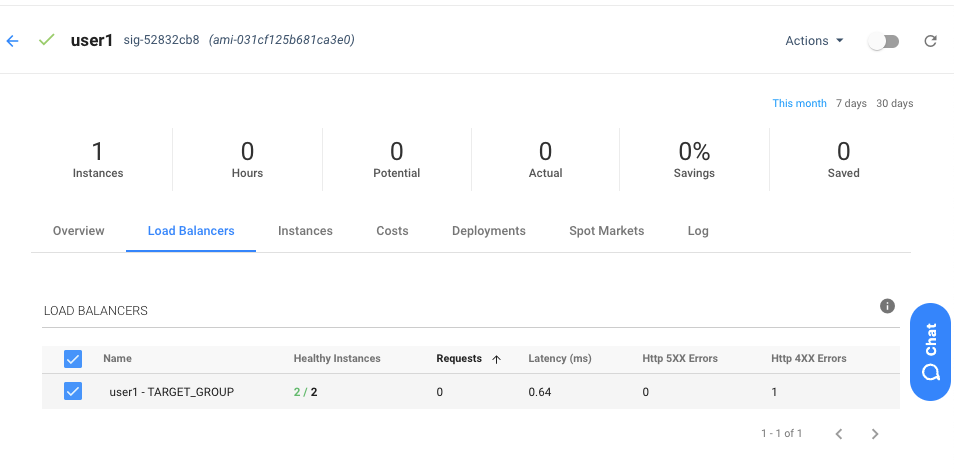
When we import a configuration from a load balancer or Auto Scaling Group, Elastigroup will not terminate the existing instance(s). For that reason, you may see 2 instances as healthy in the load balancer, despite only creating the group with 1.
Now let’s work on further optimizing this group by configuring some changes within Predictive Rebalancing.
Click Action in the top right

Click Edit Configuration

Click Next on the Get Started Screen and navigate to the Compute tab. This will display the current conditions of the Spot Markets. Spot Markets can change very frequently and although they might appear green today, we will walk through best practices to reliabily run your infrastructure on Spot instances.
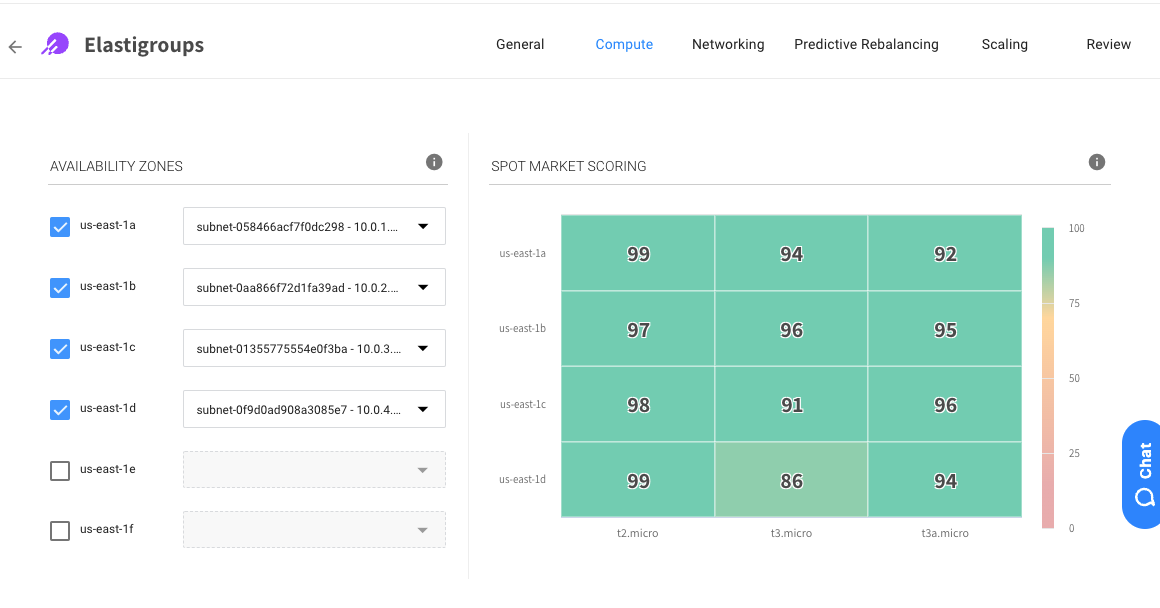
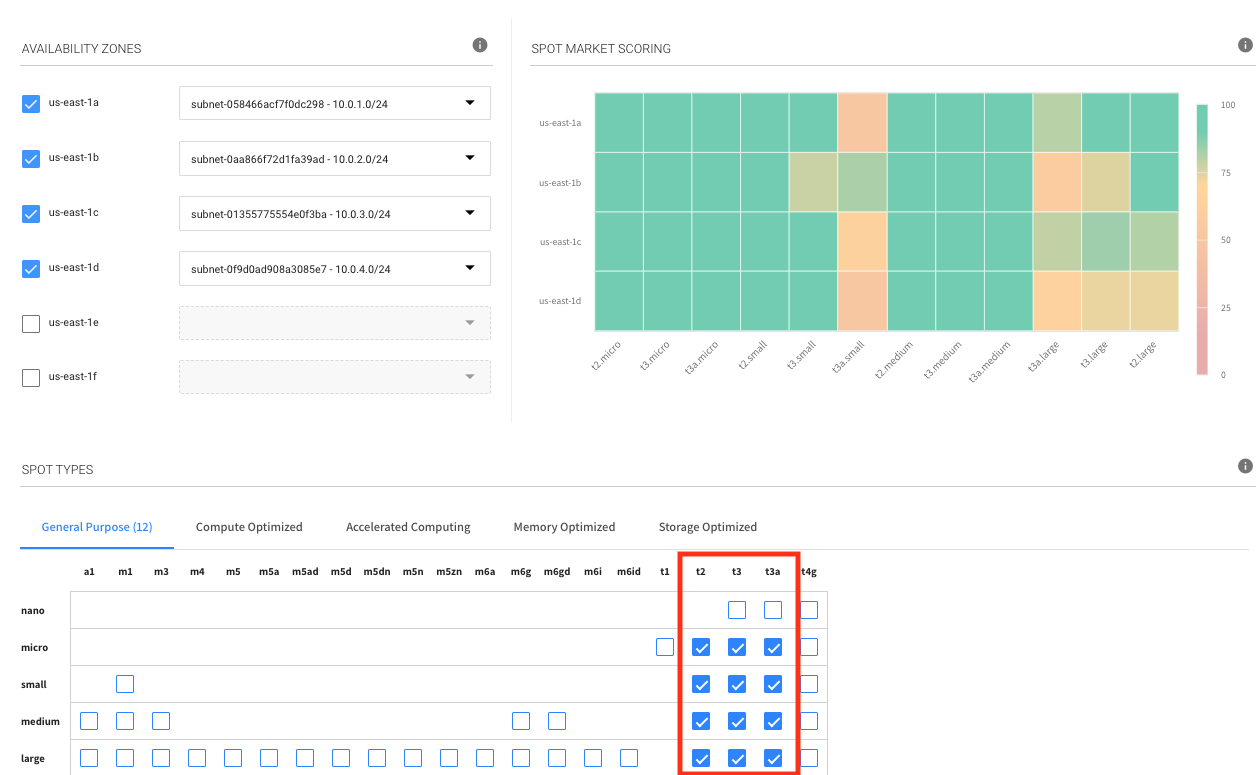
Scroll down on this page and under Spot types, select the t2, t3 and t3a family with sizes micro, small, medium, large as shown below. Since we have four different availability zones and twelve different instance types, this gives Elastigroup 48 different Spot markets to launch into. This means Elastigroup can respond in real time if spot markets are poor for specific AZ’s and instance types by launching into better markets.
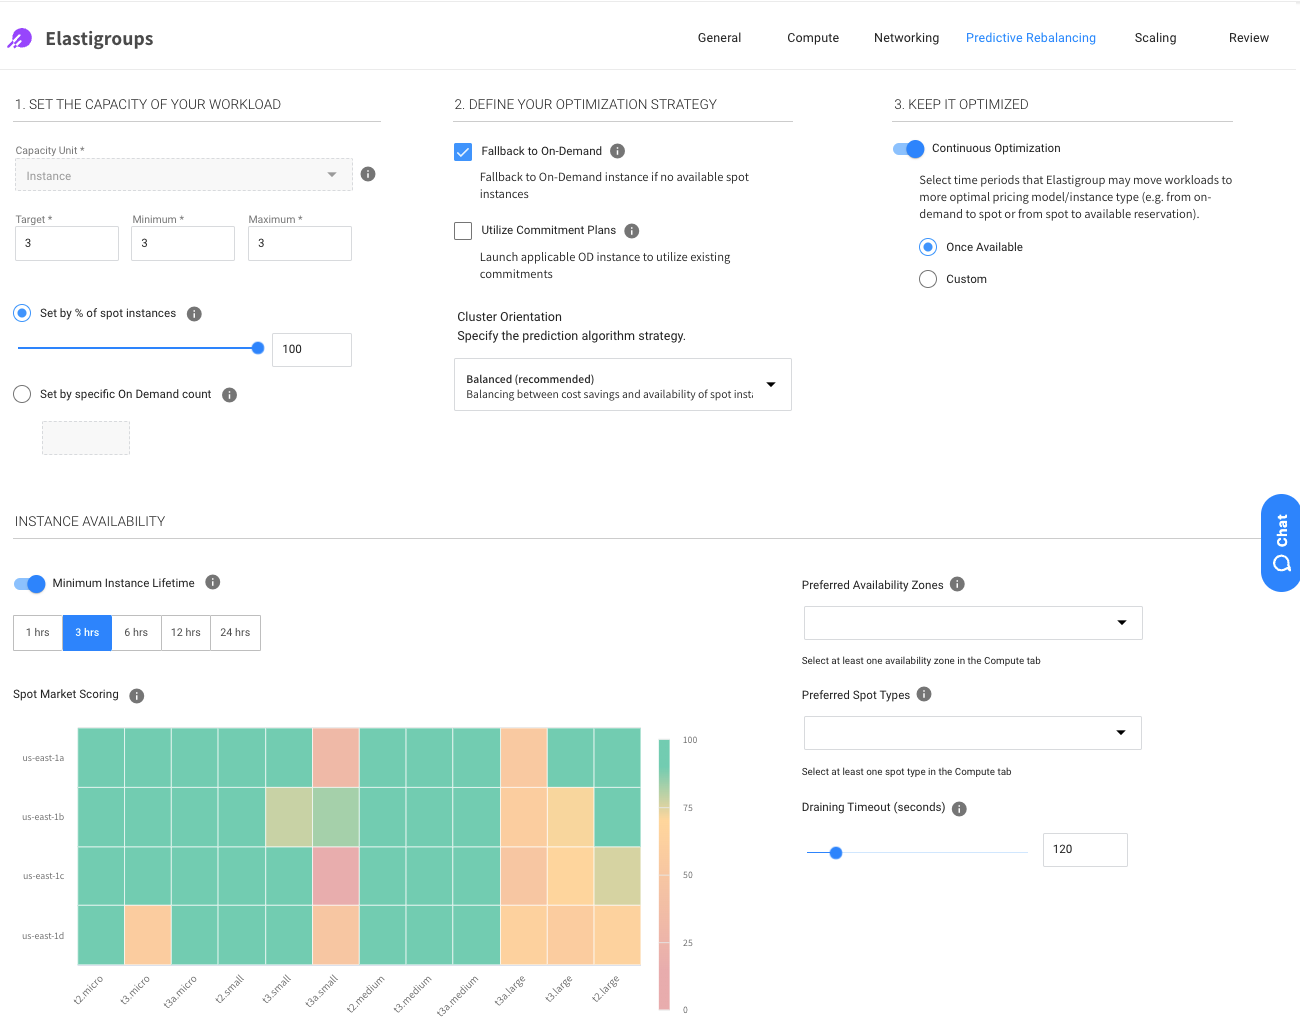
Click Next twice until you arrive at the Predictive Rebalancing tab. Let’s modify the target, min and maximum to 3 instances and set a minimum instance lifetime of 3 hours as shown below. The minimum instance lifetime feature gives preference to markets that based on our data, will run for at least 3 hours prior to being interrupted. One example use case for minimum instance lifetime is for customers that are running batch processing workloads that need to scale up for jobs that will run for X amount of hours. Minimum instance lifetime will help those jobs run on instances that should remain running for the duration of the job.
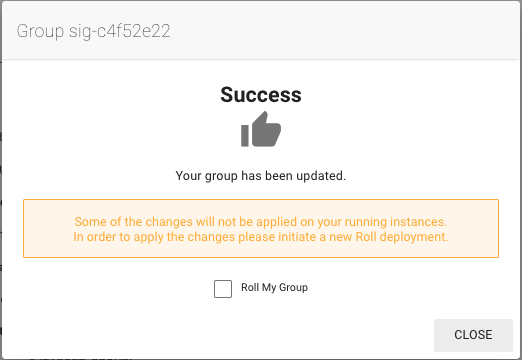
Click Next until you arrive at the Review tab and then select Update for your changes to take effect. You can leave the box unchecked for rolling your group. We will demonstrate the cluster roll after this.
You can now review the instances added in the overview tabs. By default, we will not immediately the instances in a group unless you roll the group. Elastigroup provides a seamless blue/green deployment approach that makes updating infrastructure changes seamless. To demonstrate this feature, navigate to the URL provided to you for the Application Load Balancer. This will load a simple apache web page that will load basic metadata for the instances behind the load balancer. If you refresh this page a few times you will see they match the instances within your Elastigroup. Let’s suppose we want to add in some userdata to show the Instance Type on this page.
Click Action in the top right
Click Edit Configuration
Navigate to the compute tab and select Additional configurations –> User Data. Replace the current user data with the exmaple below:
#! /bin/bash
exec > >(tee /var/log/user-data.log|logger -t user-data -s 2>/dev/console) 2>&1
echo "Hello from user-data!"
sudo apt update
sudo apt install -y apache2 unzip

curl "https://awscli.amazonaws.com/awscli-exe-linux-x86_64.zip" -o "awscliv2.zip"
unzip awscliv2.zip
sudo ./aws/install
AWS_INSTANCE_ID=`curl -s http://169.254.169.254/latest/meta-data/instance-id`
REGION=us-east-1
AZ=`aws ec2 describe-instance-status --instance-ids $AWS_INSTANCE_ID --query 'InstanceStatuses[0].AvailabilityZone' --output text`

echo "<html>" > index.html
echo "<p>Instance ID: $(curl http://169.254.169.254/latest/meta-data/instance-id)</p>" >> index.html
echo "<p>Host: $(curl http://169.254.169.254/latest/meta-data/hostname)</p>" >> index.html
echo "<p>Availability Zone: $AZ</p>" >> index.html
echo "<p>AMI: $(curl http://169.254.169.254/latest/meta-data/ami-id)</p>" >> index.html
echo "<p>Public IP: $(curl http://169.254.169.254/latest/meta-data/public-ipv4)</p>" >> index.html
echo "<p>Instance Type: $(curl http://169.254.169.254/latest/meta-data/instance-type)</p>" >> index.html

echo "</html>" >> index.html
sudo cp index.html /var/www/html/index.html
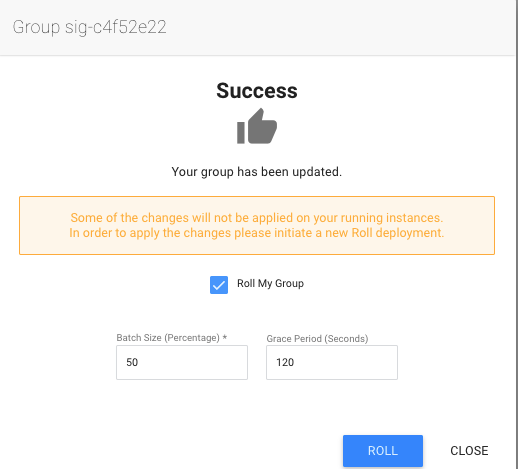
Now click Next until you reach the review tab and click update. When the success box appears on your screen, select “Roll My Group” and we will start a blue/green deployment by setting a batch size of 50% and Grace Period of 120 seconds as shown below.
During the deployment process, let’s monitor the Application Load Balancer Public DNS name to ensure the instances are replaced gradually and no downtime occurs. You should start to see the new instances register to the load balancer with the new user data and instance type appearing on the bottom of the page.
Additionally, we can monitor the Deployment Tab to follow along with all the actions Elastigroup is performing behind the scenes:
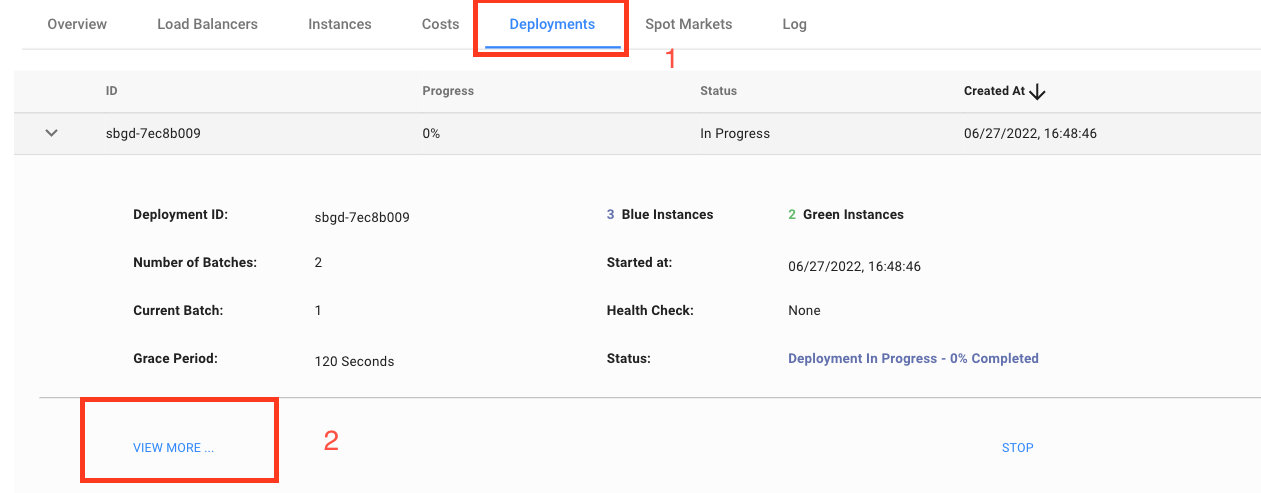
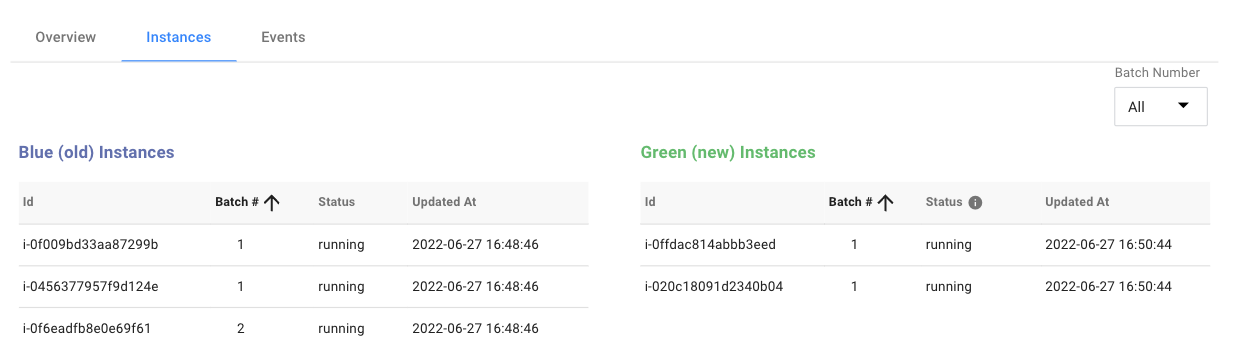
When we create an Elastigroup from the import wizard, we will not terminate the instance/ASG from AWS. For that reason, as you refresh the ALB DNS name, you will still see 1 instance behind the load balancer with the old userdata. This deployment will take around 5-6 minutes.